by TANNER JOHNSON
For this month I wanted to share my all time favorite cut of meat to cook. Since I first tried the “reverse sear” method I haven’t wanted a steak cooked any other way. This is a cook you can do using an oven, grill, or a smoker. My preferred way is to use the smoker for the first part of the cook, and to finish it off, I sear directly over some blazing hot coals at around 650-700 degrees. Another solid way to do this if you don’t have a charcoal grill for the sear, is to finish it off with the sear on a really hot cast iron pan on the stove, a griddle (like a blackstone) or a gas grill turned as high as it will go. If you want to do this all inside, you can even cook the steak in the oven first and then just finish with a sear on the stove.

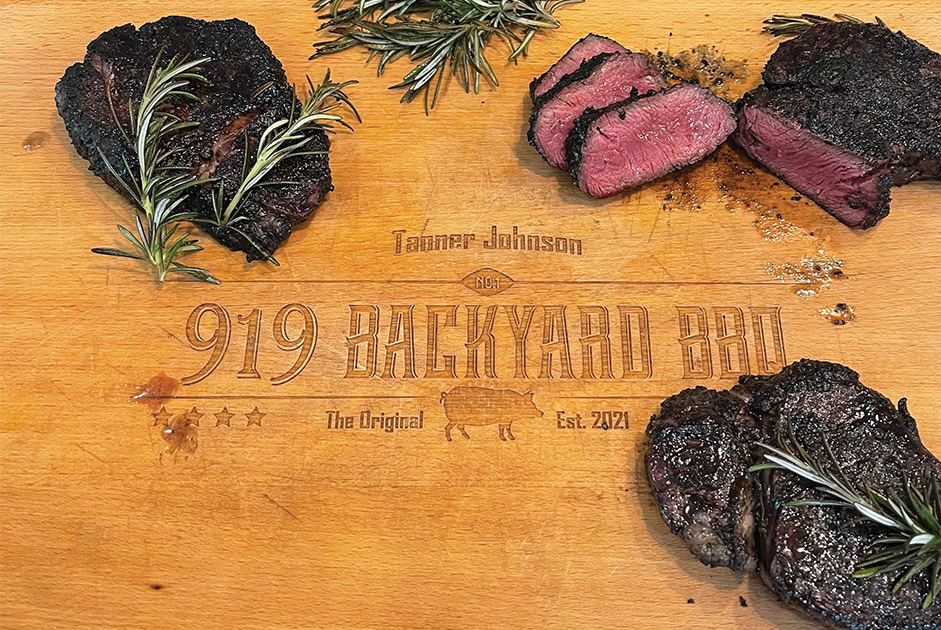
Typically most people will just grill a steak on high heat for a few minutes per side until you get the desired temp.. Or sear it first and then finish in an oven, or indirect heat until the preferred temp. The reverse sear is just doing this same method in the opposite order… as the name explains. Cooking a steak this way (any steak, not just a filet) allows you to have much more control of the cook, avoiding flare ups and overcooking the steak. This also allows for the perfect wall to wall cool pink center (if you like medium rare which I love.) Because we rest the meat after the time it spends in the smoker for 10-15 minutes before searing, you can serve it up and slice right in after you’re done searing. Now let’s dive into the steps to create the perfect melt in your mouth filet that will taste better than most steakhouses serve for a fraction of the price!
- First, you’ll want to find some good thick filets at the store. I’ve been getting the USDA Prime filets from Sam’s club lately and they are phenomenal.
- Then I always like to let the steaks sit out of the fridge to get to room temperature for around 30 minutes before cooking.
- Preheat your oven or smoker to 225-250.
- Rub a little olive oil on the steaks, then season with Salt & Pepper or your favorite steak seasoning. My personal favorite is Hardcore Carnivore Black – it is a traditional beef seasoning mixture, with some black pepper, garlic, sea salt and some activated charcoal that gives it a really unique flavor profile and amazing color.
- Once your cooker is around 225-250, put the steaks in (depending on thickness and the temperature you’re going for, they should only take 30-45 minutes to get to temp).
- You’ll want to set a 20 minute timer or so and flip the steaks halfway and check the internal temp. We always use the MEATER+ probe that is inserted into the steak before the cook to keep track of the temp the whole time.
- Once your steaks get to the desired temp (115-120 internal) if you’re going for medium rare, 125-130 if you’re going for medium/medium well – pull them out and let them rest for about 15 minutes (the resting period allows the juices in the meat to redistribute – otherwise, when you slice it you’ll have a super juicy cutting board, and not a juicy steak.

- Crank up your cast iron, charcoal, or griddle – whatever you’re going to do the finishing sear on and let it get very hot while the steak(s) are resting.
- Sear for about a minute (sometimes a minute and a half) per side until you get that delicious crust and you’re temping around 130-135. I like to be on the lower side of medium rare and try to shoot for 130.
- Note: If you’re searing over charcoal that’s all there is to it – extreme high heat and live fire. It may take less than a minute to get the right temp.
- If you’re searing on a cast iron pan or a griddle, it’s good to use some butter or oil, and some fresh herbs like rosemary, thyme, etc. After you flip the steak, you can start basting it with the melted butter & herbs.

- Now after you’ve reached your perfect internal temp and you have that delicious crust from the sear, you can slice it right up and dig in. Once you master this technique you’ll question buying a steak from an expensive steakhouse forever – plus homemade meals just always taste better!
